Patton Trinity SmartNode Configuration with 3CX
Patton SmartNode gateways running SmartWare can easily be configured and provisioned from within the 3CX Phone System. Just select the model from the drop-down and fill in the necessary parameters, load it in the SmartNode and you are ready to start making and receiving calls. This is great, but what if you have a new Patton SmartNode running Trinity? How do you configure it like any other SmartWare SmartNode device in 3CX?
Don't waste any more time thinking about it as Patton just made it easy for you to accomplish this. Patton has created new templates that are available to download and install into your 3CX Phone System. Just a few simple steps and you will be configuring your Trinity SmartNode devices in no time at all.
Support Products:
- Trinity BRI SmartNodes (1-4 ports)
- Trinity E1/T1 SmartNodes (1-4 ports)
- Trinity FXO SmartNodes (1-8 ports)
- Trinity FXS SmartNodes (1-8 ports)
Instructions to Load Trinity Templates into 3CX
- 1. Download the NewTemplate.zip file attached to this article.
- 2. Extract the contents of the zip file into the "Downloads" folder on your Windows machine
- 3. Once there, execute the .bat file
- 3CX_Template_Move.bat
The template files are now added to the following Windows directories for your 3CX phone system:
- C:\ProgramData\3CX\Instance1\Data\Http\Templates\gateway
- C:\ProgramData\3CX\Instance1\Data\Http\Templates\fxs
***UPDATES***


***Patton Gateways can be used with your 3CX Phone System. However, the templates are created, tested and supported by Patton. Please contact our Support Team with any questions.***
Instructions to Load Trinity Configurations into SmartNodes
- 1. Enter in the IP Address of your SmartNode device.
- 2. Click the menu button from the upper left-hand side.
- 3. Select System/Configuration Files and a window will pop-up. Click the + sign to add a new config.
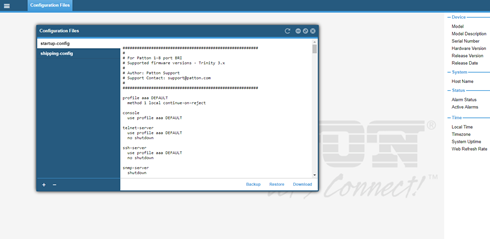
- Browse to the file and then add it as the 'startup-config' and click 'OK'. The config will now be saved and loaded on next bootup.
- To reboot the device, click the menu button and select 'Reboot'. Answer 'Yes' to the pop-up window to initiate the reboot.
Your SmartNode will now be successfully configured and registered to use 3CX.
Please contact Patton Support if you have any questions at support@patton.com.
Note from 3CX on Templates: