Best Practice - Using SSL for Encrypted Connections
Logical Foundation:
Not using an encrypted connection allows anyone listening in on the camera <-> user communication to read user-names and passwords in the clear, thus making it easy for hackers to get in on an otherwise secure system.
Years of experience, intelligent engineering and relentless testing has turned Mobotix cameras into one of the most secure security systems on the market. Most recently, Mobotix received two awards certifying the safe and great approach they’ve taken to keep unwanted guests out of their cameras. Obviously, all this effort is useless if the user-name and password can easily be found out by a man-in-the-middle approach listening in on an un-encrypted communication between the viewing device (PC, smart-phone, etc.) and the cameras.The best way to prevent this from happening is to use a SSL encrypted connection.
Technical Configuration
Any IP device which has a web server is waiting for connection requests from the outside. The type of connection is signaled by pre-assigned ports, e.g.http uses port 80 while https (SSL) uses port 443.The same is true for Mobotix cameras, those ports are set by default to make any connection possible. However, the ports can be changed within the camera to accommodate all types of ‘Port Forwarding’ rules common in routers. The difficult thing when explaining how this is setup is the fact that ‘Port Forwarding’ rules can look very different depending on the routers’ manufahttps://en.wikipedia.org/wiki/List_of_TCP_and_UDP_port_numberscturer. This includes the terminology used for the rules. Here are some of the most often used terms:
- Public port - port used behind the domain name or IP address to connect with the camera (also known as external port)
- Private port - port used within the camera to listen to connection requests (also known as internal port)
- Public IP address - IP address assigned by the ISP to the router (also the IP assigned to the domain name if a domain name is used)
- Private IP address - internal IP address of the device within the LAN (e.g. camera)
Here's an example from the DrayTek router:
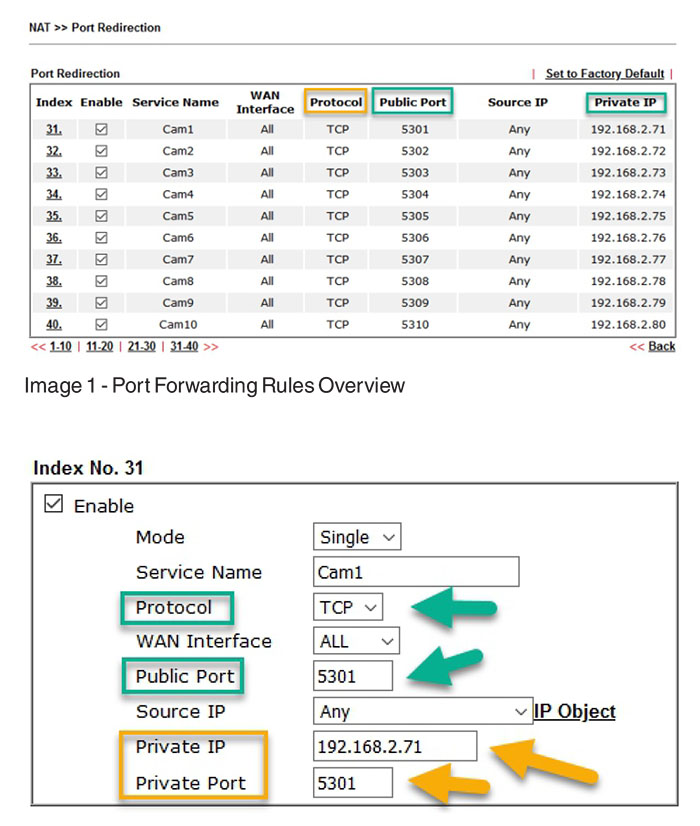
Image 1 shows the overview of 10 defined rules, one for each camera. It shows the public camera. It shows the public port and the assigned or connected private (internal) IP address of the cameras (green markers). It also shows that the TCP protocol has to be used to connect to a MOBOTIX camera (yellow marker).
Image 2 shows a single rule and how it is setup in a DrayTek router. The gteen markers show the protocol and, again, the public port. The yellow markers show the internal or private inormation. In this case, the internal port has been set up to match the extenal port. This is often done to simplify internal managemetn of all devices but it could easilly also be port 443 as the defualt port for SSL connections.
The settings within the camera have to match those settings for everythign to work. Inside the camera, the required settings are within the 'Ahttps://www.abptech.com/how-configure-mxbelldmin Menu' and then under 'Web Server':
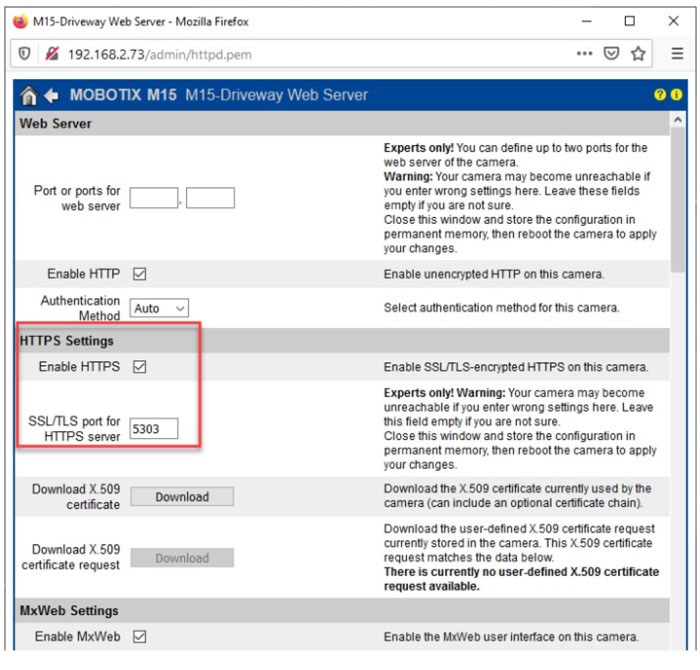
In this menu, HTTPS has to be enabled and the corresponding port has to be entered.If no port is entered, 443 as the default port will be used. Unfortunately, not all routers differentiate between an external (public) and internal (private port). Such routers do only allow one port or a port range to be entered, e.g.5303- 5303 (example for a range). If this is the case then the internal port has to be adjusted inside the camera to match the external one. It doesn’t matter which port is used. For more information on usable ports, please, refer to this Wikipedia website:
The last hurdle which might be standing in the way between a successful connection or not are firewalls. Such firewall systems can be internal or external, meaning on the side of the ISP or WISP. It is highly recommended to check with their support line if certain ports are blocked or even if all incoming data requests are blocked.If the later is the case, it is to make end-users buy static IP addresses which usually goes hand-in-hand with lifting such limitations. After all of this is done, a successful connection should be possible if the correct settings on the software side are used. The challenge here is the type of certificate which is used to encrypt the connection. Professional web-sites are using the same principles to offer an encrypted connection, visible on the green secure marker in most modern browsers.
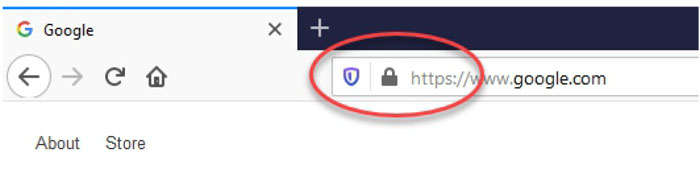
Before moving on, it is recommended to check the connection using a browser.If this connections works, then it is time to move on to the software (MxMC and MxBell for this tutorial).
Certificates
To explain the topic of certificates in this tutorial, we we are simplifying by focusing on the one major differences between certificates:public and self-signed ones. Public certificates can be checked for authenticity by any web-sever and browser. They can be purchased and are used in most web-sites on the Internet. The fact that their authenticity can be checked makes them the obvious choice for daily operations like shopping or banking on the Internet. However, connecting to your own cameras isn’t a security risk which is why Mobotix cameras are only equipped with so called self-signed certificates. Self-signed certificates cannot be checked for authenticity online and will through a warning or error message when trying to connect with a browser:
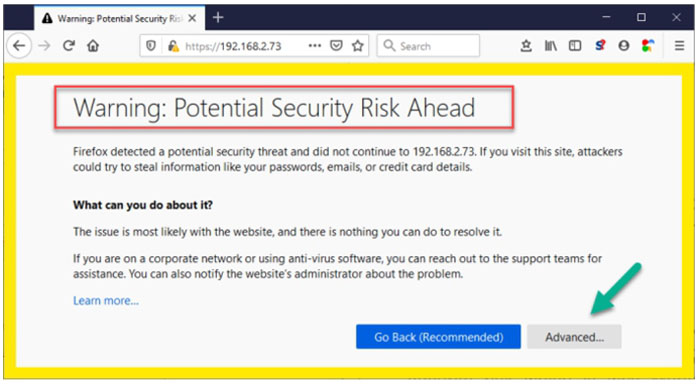
Only using the ‘Advanced...’button allows you to override this warning and connect to the device or camera. Since our software, Mx Management Center as well as the App MxBell using the same methods to connect with the web-server of the camera, they too will show you a warning message which has to be answered correctly to avoid further issues with installations on the end-client side.
Mx Management Center
Once MxMC is connected to a new camera using an encrypted SSL connection, MxMC will detect that the certificate is self-signed which in turn triggers this message:
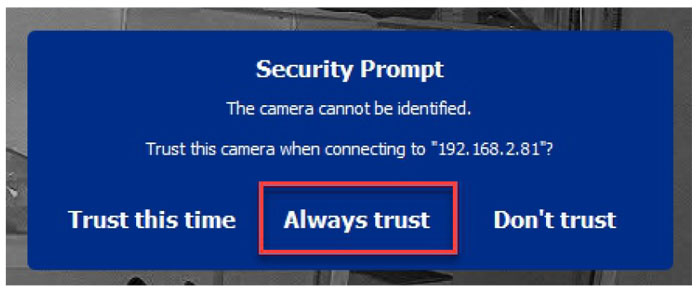
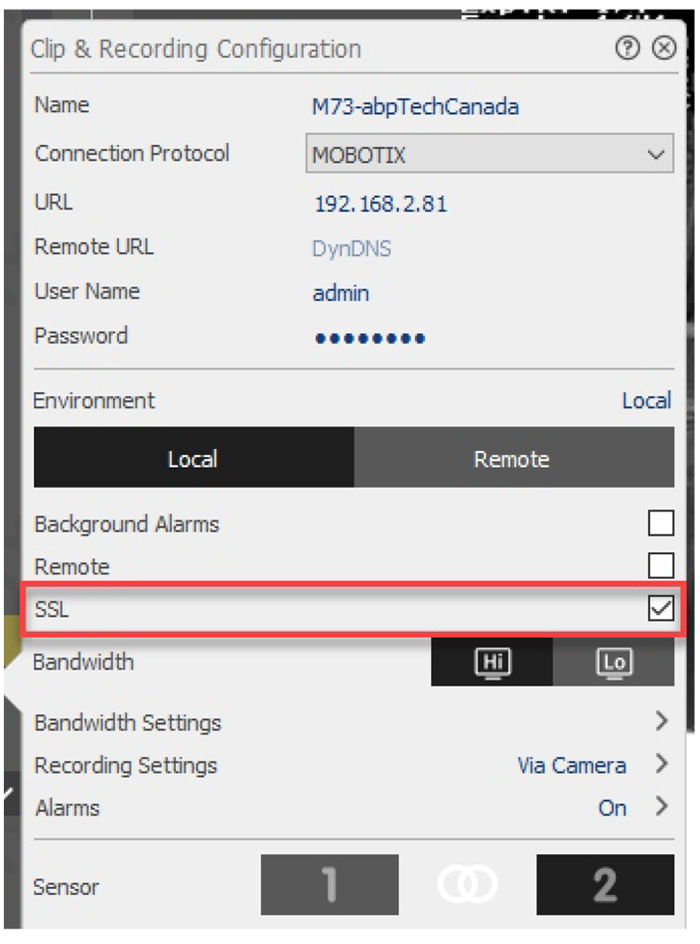
To ensure that this message doesn’t appear, again, the middle button ‘Always Trust’has to be selected. As long as the camera is added using the MxMC, the required settings for the camera is turned on automatically. However, should a camera be added manually, the SSL checkmark has to be selected:
MxBell
MxBell is the new Mobotix App for Apple and Android devices. Of course, the old App still works and follows the same principles but it is not discussed in this tutorial. MxBell follows the example of MxMC and searches and finds cameras on its own. If the cameras are added in this fashion, then all settings regarding SSL connections are made automatically, again. However, if a camera is added manually the following switch has to be enabled:
A full tutorial on how to configure MxBell, please, use this link to our MxBell Configuration guide: https://www.abptech.com/how-configure-mxbell
Alternatives - Side Stepping Port Forwarding
As you can see, port forwarding and SSL connections need some time and understanding while also holding a lot of elements which can go wrong or stop working. An elegant way to side stepping these issues is to use our MxMSP platform.